SU Ag Center SNAP-Ed ProgramSU Ag Center SNAP-Ed ProgramSU Ag Center SNAP-Ed ProgramSU Ag Center SNAP-Ed Program
  • Healthy Resources
    • Nutrition Education
    • Physical Activity
    • Smart Shopping
    • Food Safety
    • Healthy Recipes
    • Gardening & Planting
      • B.R.I.C. Gardening
      • B.R.I.C. Garden Locations
    • Community Involvement
  • Media Publications
    • Magazines
    • Fact Sheets
    • Infographic Sheets
    • Videos
    • Community Food Resource Guide
    • Calendars
  • News & Events
  • Kidz Korner
    • Become a MyPlate Champion
    • Activity Sheets
    • MyPlate Song
    • Champion Certificate
    • Kidz Korner Media
  • C.H.E.F. Camp
    • C.H.E.F. Camp 2024
    • C.H.E.F. Camp 2023
    • C.H.E.F. Camp 2022
    • C.H.E.F. Camp 2021
  • About Us
  • Contact
    • FAQs

Gardening

planning & planting

Gardens provide exercise, recreation, therapy, a sense of community support, and an opportunity to be close to nature. Gardening helps to improve the human spirit and teaches vital lessons about sharing, nurturing yourself and living in harmony with the earth.

Planning the Garden Checklist

  • Determine the size garden you can easily care for (starting off small and expanding is always a good idea).

  • Draw a plan of the space. It can be any shape; rectangle, square or round.

  • Get a soil test. Test for both nutrient content and soil toxicity. Pairing up with your area’s Cooperative Extension Agent will help with the soil test.

  • Determine if the garden will be in-ground or in raised beds/containers – according to either space, or results of a soil toxicity test.

  • Decide what vegetables you want to grow.

  • Determine which way is north. This is important information to know because rows that run north to south allow plants to receive the most sunlight as the sun moves from the east to west. Also, it is best to plant tall plants (for example okra, corn, pole beans, peas and tomatoes) on the north side of a garden because they will not shade the shorter plants.

  • Spacing for vegetables in the garden is determined by the equipment used to plant, main­tain, and harvest the crop. It is also determined by the type of vegetables planted.

Tips for Planning the Garden

Stay organized with a grocery list to avoid buying items you don’t really need. Grocery List Basics:

  • An average spacing is 36 to 48 inches between rows.

  • Avoid over-planting. This is one of the most common mistakes in gardening. Placing plants too close together not only forces the production of smaller fruits and vegetables, but also encourages pests and disease problems.

  • Some vegetables require a lot of space because they spread as they grow.

  • Plant the varieties that are recommended for your region.

Planting the Garden: Seeds and Transplants

Planting a seed: When planting most seeds remember that you plant a seed two times as deep as the seed is big.

  • Dig a hole the appropriate depth for the seed. For small seeds, just set them on top of the soil and sprinkle more soil on top of them.
  • Place the seed in the hole (two or three seeds can be placed in the hole to ensure that at least one seed sprouts).
  • Cover seeds with soil. Act as if it were a small baby that you are tucking in at night, pulling the blanket over it (putting the soil over the seeds).

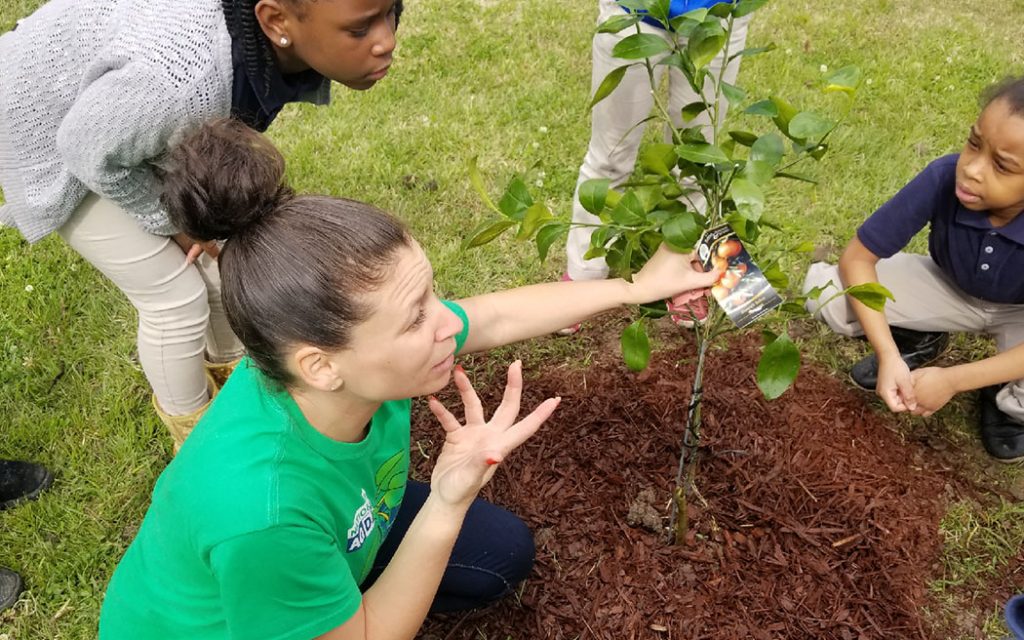
How to plant a transplant? A transplant is a small plant that has been started indoors and placed in the field/garden when the root ball has formed. 

  • Dig a hole the appropriate size for the transplant’s root ball to fit in to.
  • Place the transplant into the hole with the root ball under the soil and the plant itself outside or above the soil.
  • Cover the root ball with soil. The ‘tucking in an infant’ strategy can be utilized for transplants as well.
  • Press down firmly with hands carefully around the base of the plant (careful not to harm the plant stem or leaves) and say out loud “Good Night” – remembering to do this ensures all air bubbles are pushed out of the soil and full root-to-soil contact is intact. 
  • Press down firmly on the soil, that is over the seeds, and say out loud “Good Night.” This ensures that all air bubbles in the soil are pushed out. 
  • Always water after planting anything!


Row Planting: There is a certain time to plant your garden.

  1. Check on your garden plan before you start planting and determine where you’re planting what and how much distance there is between the rows for each vegetable.
  2. Mark the row to be planted and put stakes at either end of the row. Tie a string around one stake and stretch the string to the other stake. Tie this end. This marker will help you keep your rows straight.
  3. Use the string as a guide in making a shallow trench by dragging the handle of a garden hoe under the string.
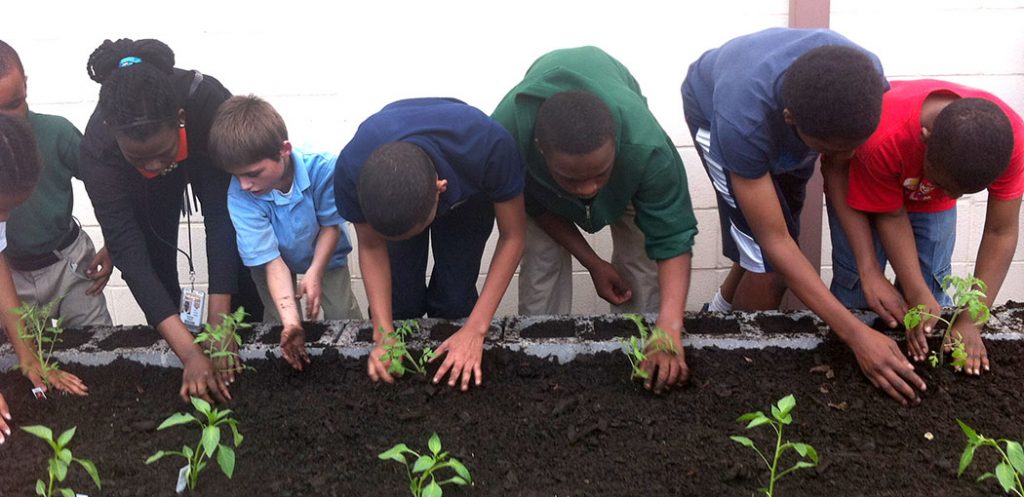
  4. It’s now time to plant your seeds! Drop the seeds in the trench – a couple of inches apart. If the seeds are too tiny to plant one by one, sprinkle them right out the package.
  5. Place soil gently over the seeds. Remember not to place too much soil over them. Seeds that are planted too deeply won’t sprout. Small seeds should be barely covered. Larger seeds should be planted twice as deep as their diameter.
  6. Label each row so you will know which vegetables are planted.
  7. Water your seeds with a small amount of water. Wait for the water to sink into the soil, then add more water.
  8. When your seedlings have two pairs of leaves, it’s time to thin the plants out. This means, you pull out any plants that are growing too close to each other. If plants are not thinned, the roots will not have room to grow.
Integrated Pest/Disease Management

Snails and slugs: Feed at night and can cause significant damage to the garden. Check on the garden at night and search for these enemies using a flashlight. Place pests in a bag and discard. 

Caterpillars and worms: Chew through plant leaves. Cutworms chew through a plant’s stems! You can pick these by hand and discard.

Aphids: Small green insects that infect the plant. They suck at the leaves and cause leaf damage, thus resulting in a weakened plant that is more susceptible to disease. Introducing lady bugs to the garden will keep aphids under control and an insecticidal spray will alleviate the infestation. 

Scale: A small white insect that resides on the bottom side of the leaf of a plant. Scale bugs can damage the plants foliage, causing the leaves to fall off prematurely, interfering with the photosynthesis process and making the plant vulnerable to disease. Insecticidal soap will alleviate a scale infestation.

Cucumber beetles: Yellow and green spotted, lady bug shaped, beetles. The beetles excrete onto the plants usually spreading diseases such as bacteria wilt.

Keeping a good watch on the plants in the garden is a good way to avoid infestations of harmful insects. Catching their presence as early as possible will make it easier to eradicate the insects.


Organic Insect Control: Harmful insects can be controlled utilizing safe organic methods.

  1. Cayenne and garlic: An insect spray can be made by steeping cayenne and garlic in a pot of water outside in the sun. Allow this to soak, then strain the liquid into a spray bottle and spray directly on plants to get rid of pests.
  2. Insecticidal soap/liquid soap: Insecticidal soap can be used to rid your gardens of pests such as scale and aphids. Also dish washing soap diluted with water and a splash of rubbing alcohol can be sprayed on plants.
  3. Trap crop: If there is one, or a few, particular sick plants that seem to attract all the pests in the garden – leave it! Let the pests annoy that plant and leave all the others alone. The following products can be purchased from any local health foods store, health website or grocery store that specializes in fresh foods:
  • Cedarwood oil: Cedarwood oil has been known to deter pests from a garden. It  can be mixed in with pepper spray or soap mixes.
  • Neem oil: Neem oil has been known to control harmful pests. Mix neem with one splash of liquid soap and dilute with water. This can be sprayed directly on the plants or all over the garden to deter harmful pests.
  • Peppermint oil: Can be mixed in with pepper spray or soap mixes. Natural peppermint castile soap can be diluted with water and applied to the garden.


Organic Disease Maintenance: Making sure to plant enough vegetable plants to account for any pest disruption or disease is a method of preparedness. Planting plants in sporadic order will help control pest problems. Instead of planting a whole row of tomatoes, have your row consist of: one tomato plant, one cucumber plant, one okra plant, and so on. That way, if one tomato plant becomes infested with insects… it won’t infest them all.

  1. Follow a crop rotation for the garden. Do not plant the same plant (or plants within the same family) in the same spot for at least 3 years. This will assist with disease management.
  2. Add compost to the soil of the garden (see Lesson 4). This will add beneficial bacteria to the soil and help with disease management.
  3. When a plant begins to wilt without drought or over watering stress, pull the plant immediately and dispose of it outside of the garden. This will ensure that if the plant is infected with a disease or virus, it doesn’t spread to the other plants.
  4. When a fungus appears in the garden, remove the affected areas and dispose it outside of the garden. This ensures that the fungus will not spread to the other plants.
  5. Utilize an integrated crop garden plan.
Composting

The process of composting is aerobic, meaning it requires oxygen. Microorganisms feed on the organic matter, transforming it from waste into valuable compost while consuming oxygen as well. Optimum composting is done between the temperatures 80˚F and 150˚F.  The compost pile should remain moist and will require watering at times. The compost pile’s contents should not be so waterlogged that when squeezed, water drips out. However, it should not be so dry that it does not feel moist to the touch. A properly maintained compost pile should not have a foul odor. If it does, make sure it is not waterlogged, and all fresh green waste is covered by dry waste. 

How to start a compost pile at your garden?

  1. Choose a spot to keep your compost pile. It can be an open pile, or enclosed by some sort of mesh bin. The compost pile MUST be able to breathe. Compost bins can be made out of old wooden pallets. If you use something like an old garbage can, make sure it is full of holes for the compost pile to be able to breathe.
  2. Start the compost pile with fresh green waste: vegetable clippings from the kitchen, any vegetables or fruit waste,  and grass clippings. Avoid putting meat or bones in the compost pile.
  3. Always cover fresh green waste with dry brown waste. This keeps all pests away from the compost pile and will ensure that the compost pile doesn’t smell bad. Examples of dry brown waste are dry leaves, dry straw, or dry grass clippings.
  4. Compost piles should be arranged like so: dry brown waste, fresh green waste, dry brown waste and fresh green waste
  5. Material can be added to the compost pile on a daily basis. To speed up the process, the compost pile can be turned by a shovel or pitch fork.
  6. If the pile remains stationary it will take longer, but finished compost will be available at the bottom of the pile first. Finished compost is a beautiful rich black color and should not have a bad odor to it.
  7. Once the compost is finished, it can be added to the garden near planted plants or mixed into soil before planting. This will help the plants to be healthy and produce a lot of fruits and vegetables!
Ⓒ2023 | Design by Allison Ezidore-Tassin for SU Ag Center SNAP-Ed Program | Disclaimer
  • Healthy Resources
    • Nutrition Education
    • Physical Activity
    • Smart Shopping
    • Food Safety
    • Healthy Recipes
    • Gardening & Planting
      • B.R.I.C. Gardening
      • B.R.I.C. Garden Locations
    • Community Involvement
  • Media Publications
    • Magazines
    • Fact Sheets
    • Infographic Sheets
    • Videos
    • Community Food Resource Guide
    • Calendars
  • News & Events
  • Kidz Korner
    • Become a MyPlate Champion
    • Activity Sheets
    • MyPlate Song
    • Champion Certificate
    • Kidz Korner Media
  • C.H.E.F. Camp
    • C.H.E.F. Camp 2024
    • C.H.E.F. Camp 2023
    • C.H.E.F. Camp 2022
    • C.H.E.F. Camp 2021
  • About Us
  • Contact
    • FAQs
SU Ag Center SNAP-Ed Program